| Quantity | Unit Price | You Save |
|---|---|---|
| 3 or more | R 2,588.56 | 3.74 % |
| 6 or more | R 2,528.83 | 5.96 % |
- Stock: 5
- Model: AC411-095-11
- Weight: 1.22kg
- Dimensions: 166.00mm x 332.00mm x 332.00mm
- SKU: AC411-095-11
- UPC: 6009515851637
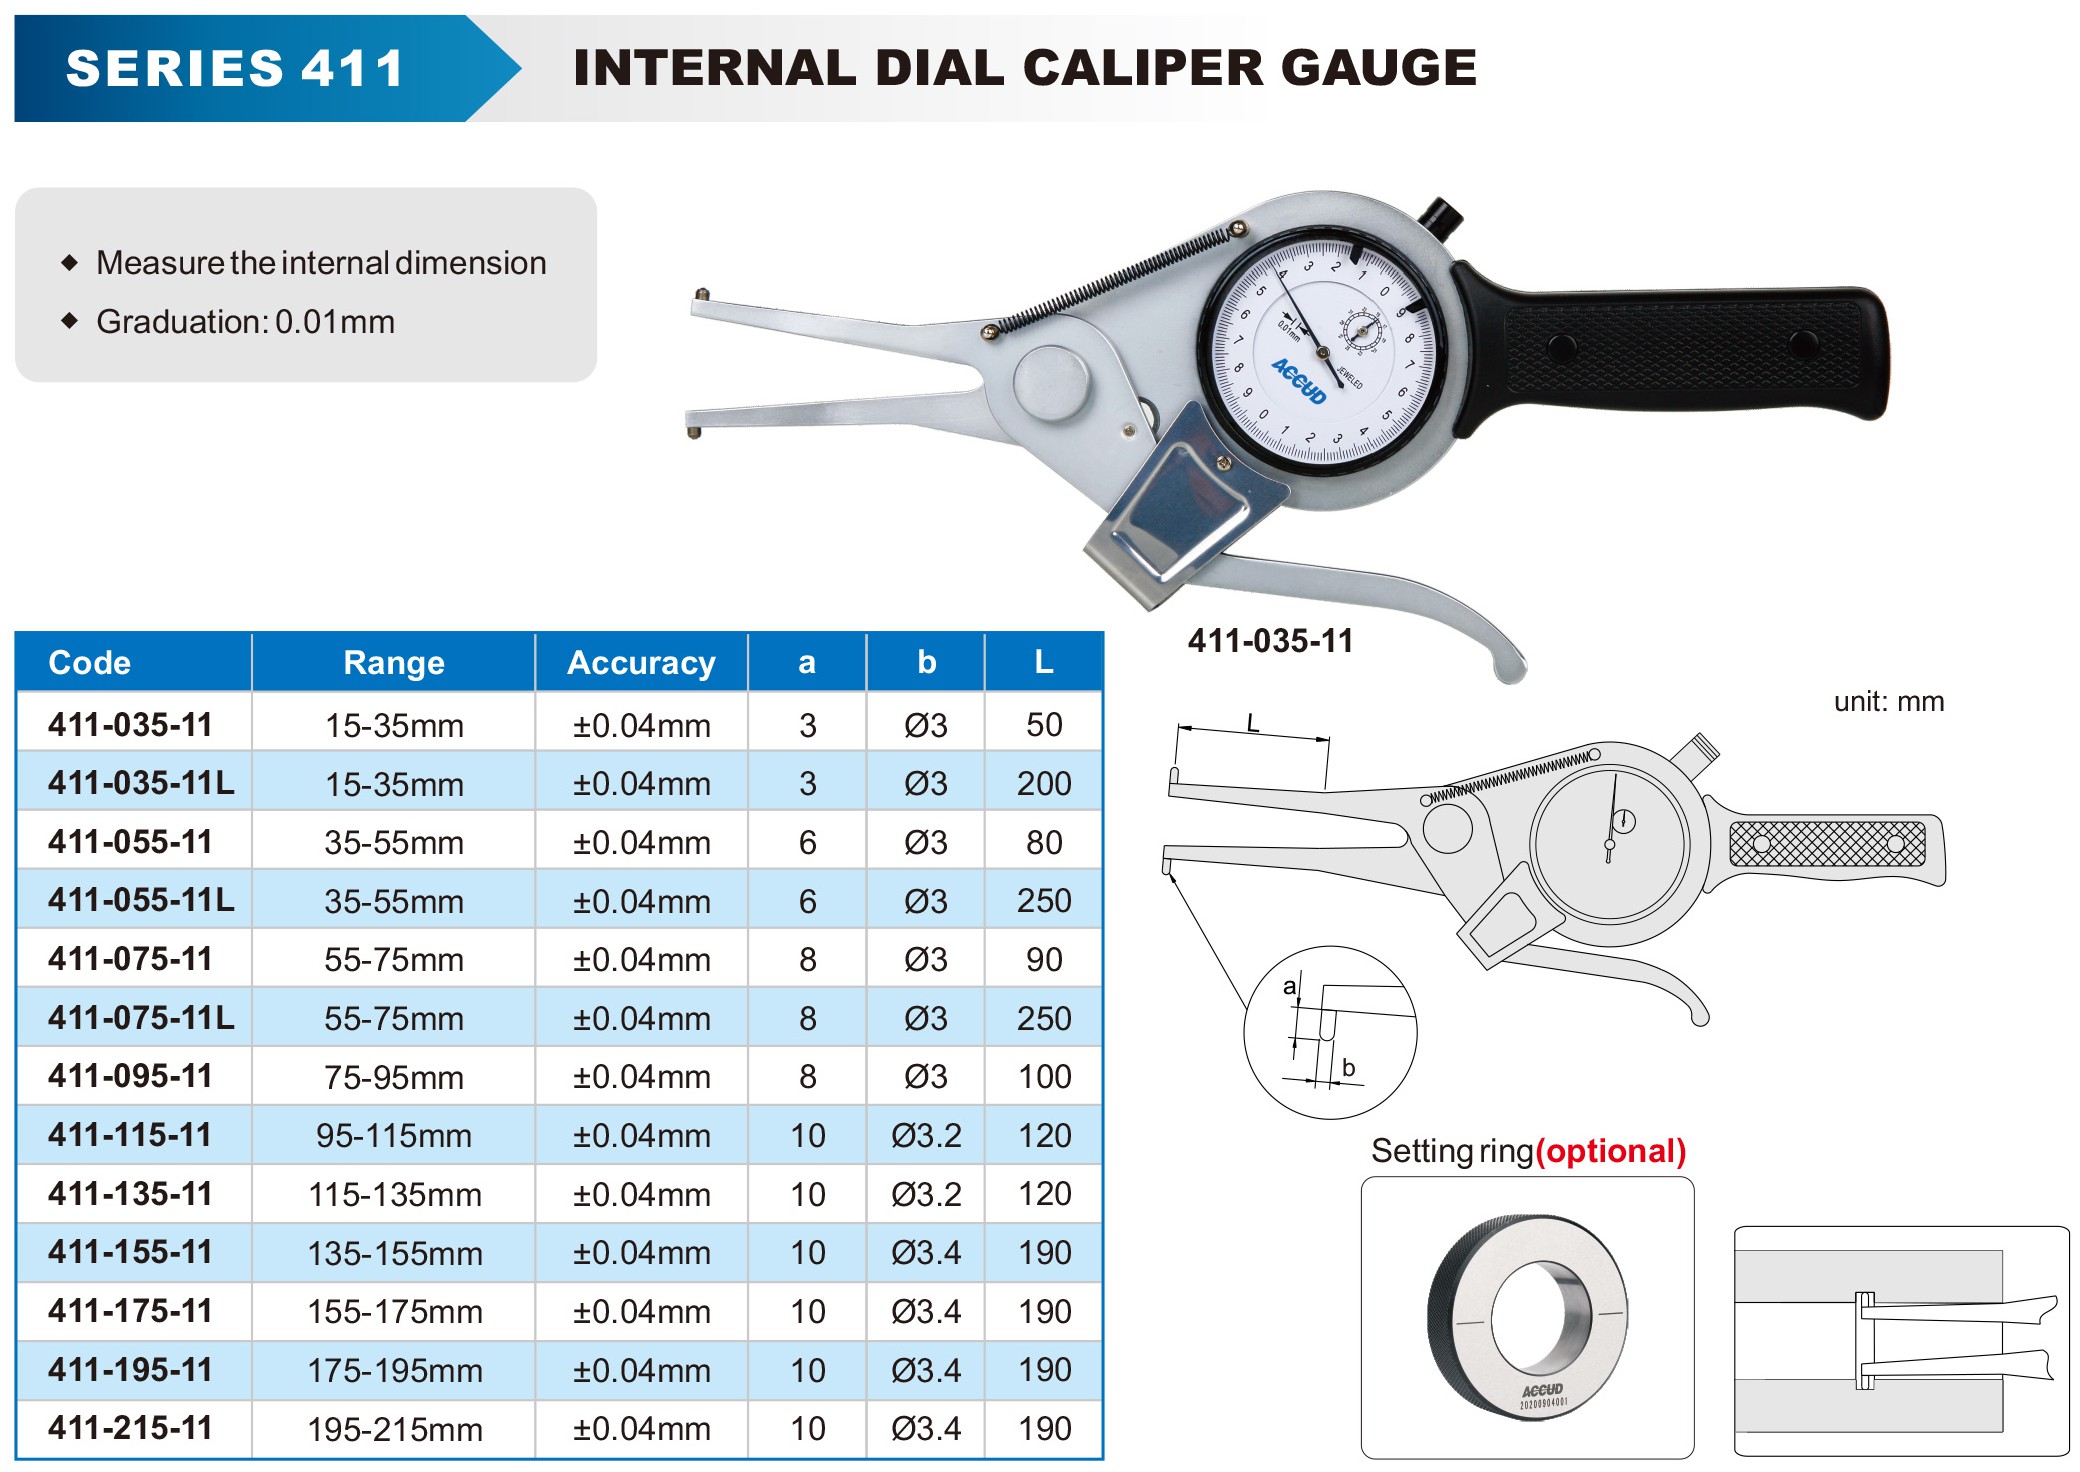
SERIES 411
The Accud 411 Series internal dial indicators utilize spring-loaded jaws to make constant point contact pressure to take highly accurate comparison measurements of hole diameters and groove and tube thicknesses. The dial display provides precise, readable measurements in metric or inches. It is mostly used in conjunction with an optional setting ring for accuracy.
Internal Digital Calipers are known for their ease of use, accuracy, and versatility. They are commonly used in manufacturing, machining, and inspection processes to ensure that components meet exact specifications. The calipers come in a variety of models with different ranges and resolutions, allowing users to select the right tool for their specific application.
Overall, Internal Digital Calipers are a reliable and essential tool for anyone who needs to measure internal diameter of objects with precision and accuracy.
Graduation: 0.01mm
Range: 75mm - 95mm
Accuracy: 0.04mm
Jaw Length: 100mm
Manufacturer Cat No: 411-095-11
Features at a glance
-
Dial Indicator: This is the primary display component of the gauge. It features a circular scale and a pointer that moves in response to the measurement, providing a visual reading of the dimension.
-
Measuring Jaws or Probes: These are the parts that come into contact with the internal surfaces being measured. They extend into the space and can be adjusted to fit snugly against the interior walls.
-
Body: The main structure that houses the internal mechanism and supports the dial indicator and measuring jaws. It provides stability and ensures accurate measurement.
-
Adjustment Mechanism: This allows the user to fine-tune the position of the measuring jaws to obtain an accurate reading.
-
Calibration and Zeroing: Many dial caliper gauges have a mechanism to set the dial indicator to zero, ensuring that measurements start from a known reference point.
Internal Measurement Dial Caliper Gauge AC411-095-11


